How to Install a Mobility Scooter Canopy?
On this page (6 sections)
Installing a mobility scooter canopy is a straightforward process if you have the right tools and follow a few key steps. You can generally complete the installation yourself with basic DIY skills. Properly fitted canopies provide excellent protection from the elements, making your scooter rides more comfortable in any weather.
A mobility scooter canopy can make a big difference in your daily travels. It offers crucial shade on sunny days and keeps you dry during unexpected rain showers. We’ve found that choosing the right canopy style for your specific scooter model is also important for a secure and effective installation.
- Canopies protect you from sun and rain.
- Installation is usually a DIY project.
- Choose a canopy designed for your scooter.
- Follow instructions carefully for best results.
Let’s get your mobility scooter ready for all types of weather. We’ll walk through the simple steps to install your new canopy.
“`htmlGetting Your Mobility Scooter Canopy Installed
Installing a mobility scooter canopy is an achievable DIY project. Most canopies are designed for easy assembly. You can usually finish the job in an afternoon. This guide will walk you through the typical steps. We found that having a helper can make some parts easier. It’s like having an extra pair of hands when you really need them.
Choosing the Right Canopy for Your Scooter
Before you start, make sure you have the correct canopy. Canopies are not one-size-fits-all. They are often made for specific scooter models or brands. We discovered that a canopy that doesn’t fit well won’t offer the best protection. It might also be more difficult to install securely. Always check the product description or consult with the manufacturer.
Types of Mobility Scooter Canopies
There are a few common types of mobility scooters with canopies you might encounter. These range from simple sunshades to full enclosures that offer robust weather protection. We found that most users look for something that offers a balance of coverage and visibility. The most common types include:
- Full enclosure canopies: These typically have clear vinyl or fabric panels that surround you. They often include a zippered front for easy entry and exit.
- Brolly-style canopies: These are more like a large umbrella attached to your scooter. They offer overhead protection but may leave your sides exposed.
- Folding or collapsible canopies: Many canopies are designed to fold down when not in use. This makes storage and transport much easier.
We also found that some canopies come with built-in features like lights or storage pockets. Think about what will best suit your daily needs and typical weather conditions in your area.
What You’ll Need for Installation
Gathering your tools beforehand saves time and frustration. Most canopy kits come with the necessary hardware. However, it’s always good to have a few common items on hand. We recommend having the following ready:
- The mobility scooter canopy kit (with all parts)
- An adjustable wrench or a set of socket wrenches
- A Phillips head screwdriver
- A flathead screwdriver
- Possibly a drill with appropriate bits (check your canopy’s instructions)
- A soft cloth or towel
- A helper (optional, but highly recommended for some steps)
Consulting the specific instruction manual that came with your canopy is essential. Instructions can vary between brands and models. What works for one might be slightly different for another.
Step-by-Step Canopy Installation Guide
Let’s break down the installation process. We aim to make this as clear and easy to follow as possible. Remember, take your time and don’t rush. It’s better to be careful than to make a mistake.
Step 1: Unpack and Identify All Parts
Open the box and carefully lay out all the components. Compare them against the parts list in your instruction manual. We found that making sure you have everything before you start is a huge time saver. Sometimes small parts can be hidden in packaging. Ensure you have all the poles, fabric sections, connectors, and hardware.
Step 2: Assemble the Frame Structure
This is often the most involved part. Most canopies use a series of lightweight poles that connect together to form a frame. You’ll typically insert these poles into fabric sleeves or attach them using connectors. We found that some poles might have elastic cords running through them, helping them snap into place easily. Others may require small screws or clips to secure them. Follow your manual precisely here. Make sure each pole is firmly seated in its connector or sleeve.
Connecting the Poles
You’ll connect various poles to create the basic shape of the canopy. This often forms a hoop or cage-like structure that will sit over your scooter. We found that listening for a click or feeling a secure fit is a good sign. Double-check that the frame feels sturdy and that no poles are loose.
Attaching Connectors and Brackets
Some parts of the frame will connect to your scooter itself. These are usually brackets or clamps. Your instructions will show you exactly where these attach. We found that these brackets are often designed to fit around the scooter’s existing frame or seat post. Ensure they are positioned correctly for stability.
Step 3: Attach the Canopy Fabric
Once the frame is assembled, it’s time to put the fabric over it. The fabric often slides over the frame like a cover. You might need to align zippers or Velcro straps to secure it. We found that it’s helpful to have your helper hold the frame steady while you work on this. Make sure the fabric is taut and evenly distributed. This helps prevent sagging and ensures a neat appearance.
Securing the Fabric
Look for Velcro straps, snaps, or zippers that attach the fabric to the frame or the scooter itself. These are important for keeping the canopy in place, especially in windy conditions. We found that ensuring all these fasteners are securely closed is key to a good fit. Don’t leave any loose ends if possible.
Step 4: Mounting the Canopy to the Scooter
This step connects the assembled canopy structure to your mobility scooter. The brackets and clamps you identified earlier come into play here. They typically attach to the scooter’s tiller, seat post, or rear frame. You might need to use your wrench or screwdriver to tighten bolts or screws. We found that it’s important not to overtighten these fasteners, as you could damage the scooter or the canopy mounts.
Positioning for Best Fit
Your instructions will likely show the optimal placement for these mounting points. You want the canopy to be centered and secure. It should not obstruct your view or interfere with the scooter’s controls. We found that a quick test of turning the handlebars helps confirm there’s no interference. You want to ensure your maneuverability remains unaffected.
Step 5: Final Adjustments and Checks
With the canopy mounted, take a step back. Look at it from different angles. Are all the fabric panels smooth? Is the frame stable? Are all screws and bolts tightened appropriately? We recommend performing a final check of all connections. Gently push and pull on the canopy to test its stability. You might need to make small adjustments to the fabric tension or bracket tightness.
Testing Entry and Exit
If your canopy has a door or zippered front, open and close it a few times. Make sure it operates smoothly. We found that easy access is important for daily use. You don’t want to struggle to get in or out of your scooter. Ensure the zipper works without snagging.
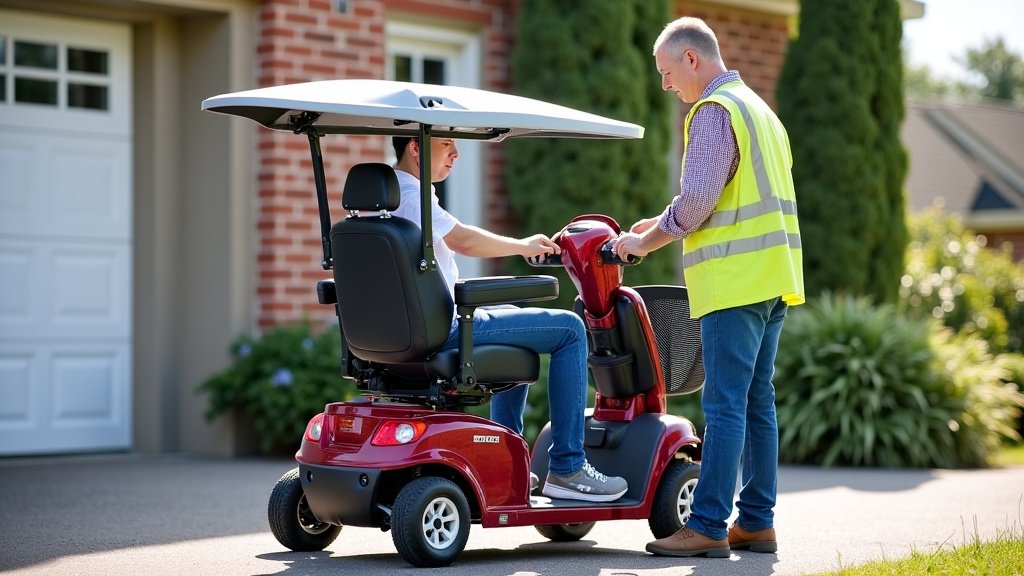
A Quick Checklist for Your Installation
Before you officially declare your canopy installed, run through this quick checklist:
- Have you unpacked and identified all parts?
- Is the frame assembled correctly and securely?
- Is the canopy fabric attached tautly to the frame?
- Are the mounting brackets firmly attached to the scooter?
- Have you checked for any interference with controls or your view?
- Does the canopy feel stable when gently pushed?
Completing this checklist ensures you’ve covered all the bases. We found that these simple checks help prevent issues down the line. Your canopy should now be ready to protect you!
“`Conclusion
You’ve successfully learned how to install a mobility scooter canopy. Taking the time to follow these steps ensures a secure and comfortable fit. This means better protection from sun and rain on all your journeys. Remember to always check your canopy’s specific instructions for the best results. Now, you’re ready to enjoy your rides, no matter the weather!
Frequently Asked Questions
How long does it typically take to install a mobility scooter canopy?
Most users find that installing a canopy can be completed in one to two hours. This timeframe can vary depending on your comfort level with DIY tasks and the specific canopy model. Having a helper can often speed up the process.
Can I install a canopy on any mobility scooter?
While many canopies are designed to be universal, fit can vary. It’s best to purchase a canopy specifically designed for your scooter model or brand. This ensures proper mounting points and optimal coverage for your scooter.
What if my canopy instructions are unclear or missing?
If your instructions are unclear or missing, we recommend checking the manufacturer’s website. They often have digital copies of manuals available for download. You can also contact their customer support for assistance.
Do I need special tools for canopy installation?
Most canopy installations require basic tools like an adjustable wrench and screwdrivers. Some models might suggest a drill, but this is less common. Always refer to your canopy’s specific instruction manual to confirm required tools.
How do I ensure the canopy is stable in windy conditions?
To ensure stability, make sure all mounting brackets are securely tightened to the scooter. Properly tension the canopy fabric using any available Velcro straps or fasteners. A final stability check by gently pushing on the canopy can confirm it’s firmly attached.