
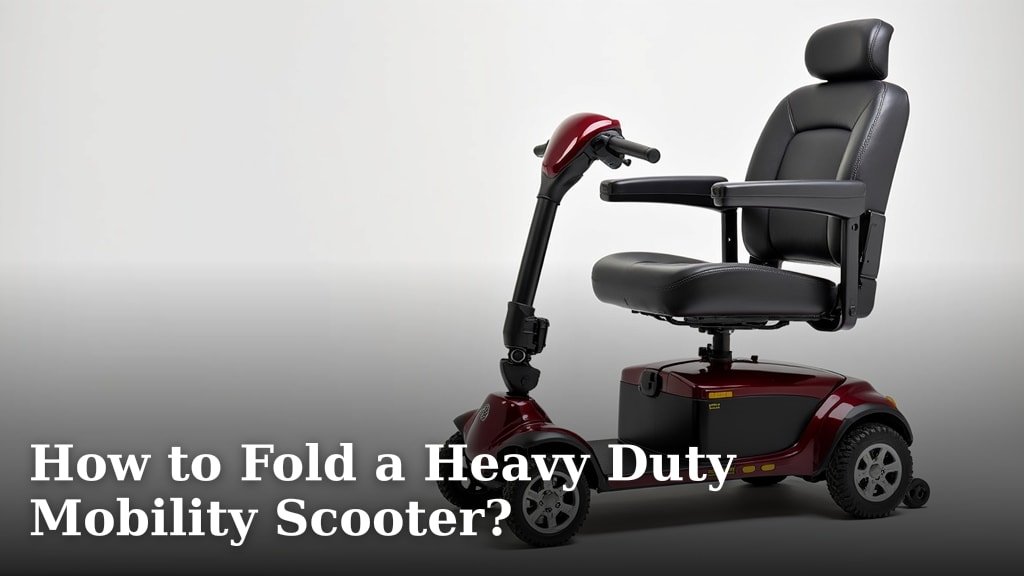
Folding your heavy-duty mobility scooter doesn’t have to be a workout. Most models fold down in just a few simple steps. You can easily collapse it for storage or transport by disengaging a few levers and folding the sections.
Transporting your mobility scooter is much simpler when it’s folded. Many owners find folding their scooter makes it fit into car trunks or small spaces. It’s a key feature that adds great convenience for daily use and travel. We’ve found this makes a big difference for many users.
- Folding is usually quick.
- Look for release levers.
- Sections fold down easily.
- Great for storage and travel.
Let’s walk through exactly how to fold your heavy-duty mobility scooter step by step. You’ll be folding it like a pro in no time!
Ready to get your heavy-duty mobility scooter packed up and ready to roll? Folding these robust machines might seem a bit daunting at first, but with a little know-how, you’ll find it’s quite manageable. We’ve broken down the process into easy-to-follow steps. You’ll be folding your scooter like a seasoned pro in no time. If you’re looking for a new model, our guide to the best heavy-duty scooters can help.
Collapsing Your Heavy-Duty Scooter for Storage and Travel
Folding your scooter is a skill that opens up a world of convenience. It means you can easily take it with you on trips, whether it’s a quick run to the grocery store or a longer vacation. Many heavy-duty models are designed with this ease of transport in mind. Let’s get started!
Step 1: Ensure Your Scooter is Safely Parked
Before you begin folding, safety is key. Make sure your scooter is on a level surface. You don’t want it rolling away while you’re trying to fold it. Also, engage the parking brake. This stops the wheels from moving. Many scooters have a dedicated brake lever or a parking brake button. Check your owner’s manual if you’re unsure.
Engaging the Parking Brake
Look for a small lever or button, often near the tiller or the main body of the scooter. Some models have automatic parking brakes that engage when you release the throttle. Whatever your model, confirm the brake is firmly set. This is a critical safety step.
Step 2: Prepare the Tiller or Steering Column
The tiller, or steering column, is usually the first part you’ll adjust. It often folds down or pivots. You’ll typically find a release lever or knob at the base of the tiller. Gently pull or twist this mechanism to unlock it. Once unlocked, you can slowly lower the tiller.
Lowering the Tiller Safely
Don’t force it. Most tillers lower smoothly. Some may have a locking pin that needs to be pulled out. You might need to hold a lever while lowering it. Once it’s in its lowest position, it should lock into place. This makes the scooter more compact. It also positions it well for the next steps.
Step 3: Fold Down the Seat
Next, you’ll want to address the seat. Many heavy-duty scooters have seats that fold down or pivot forward. Look for a lever or button on the side or underside of the seat. You might need to lift the seat slightly while operating the lever. Some seats fold very flat.
Securing the Folded Seat
Once folded, ensure the seat is secure. Some models have a strap or clip to keep it in place. This prevents it from unfolding unexpectedly. A secure seat contributes to a more compact and stable folded form. This is important for fitting it into smaller spaces.
Step 4: Separate or Fold the Main Sections
This is where heavy-duty scooters can differ. Some models have a mechanism to split into multiple parts. Others fold in a more traditional way, like a collapsing frame. Identify the release levers or buttons for these main sections. They are often located where the scooter’s sections connect.
Understanding Foldable vs. Disassemblable Designs
Many heavy-duty scooters are designed to fold into a single unit. However, some may require you to detach the battery pack or even split the scooter into two or three pieces for easier lifting. We found that models designed for portability often have clear markings for these points. Always consult your user manual for specific instructions on your model. For instance, some designs allow the rear section to fold under the front section.
Locating Release Levers and Pins
Common spots for these mechanisms include the base of the seat post, the connection between the front and rear frame, or near the motor housing. You might need to pull a lever, push a button, or remove a pin. Be gentle and deliberate. Forcing these parts can cause damage. Research indicates that proper handling extends the life of your scooter (Cleveland Clinic).
Step 5: Fold the Footrest (If Applicable)
If your scooter has a flip-up footrest, now is the time to fold it. This is usually quite straightforward. Most footrests simply lift upwards and then fold flat against the main body or deck. Some might have a small release tab to help them fold more easily.
Ensuring the Footrest is Secure
Make sure the footrest locks into its folded position. This prevents it from snagging on things when you move the scooter. It also helps create a tighter profile for storage. A neat fold means fewer parts sticking out.
Step 6: Handle Battery Removal (If Necessary)
Some heavy-duty mobility scooters require you to remove the battery pack for folding or transport. This is usually done to reduce weight and make the folded scooter easier to lift. Batteries can be heavy, so it’s wise to know how to do this safely.
Safely Removing and Transporting Batteries
Batteries typically have a connector that you unplug. There might be a latch or clip to release them. Always lift batteries from their designated handles, if available. Never lift by the cables. Store them securely in your vehicle. For safety guidelines on handling batteries, it’s best to refer to your scooter’s manual. Many sources recommend keeping batteries upright during transport.
Step 7: Final Compact Position and Maneuvering
Once all sections are folded and any necessary parts removed, your scooter should be in its most compact form. It might resemble a small trolley or a very compact package. You can now maneuver it more easily. Many folded scooters have small wheels or handles that allow you to roll them like luggage.
Checking for Stability
Give the folded scooter a gentle nudge to ensure it’s stable and won’t tip over. If parts feel loose, double-check that all levers are locked and pins are secured. A stable folded scooter is safer to handle and store. This is a key point for anyone relying on their scooter for daily mobility.
A Quick Folding Checklist
Here’s a handy checklist to help you remember the key steps:
- Park Safely: Ensure scooter is on a level surface with the brake engaged.
- Tiller Down: Release and fold the steering column.
- Seat Folded: Securely fold the seat into its compact position.
- Main Body Folded: Collapse or separate the main frame sections.
- Footrest Up: Flip up the footrest if your model has one.
- Battery Out (if needed): Safely remove the battery pack.
Common Issues and Tips
Sometimes folding can feel stiff, especially on newer scooters. We found that applying a little gentle pressure is usually all that’s needed. If a lever feels stuck, double-check that you’ve fully disengaged any locking mechanisms. Never use excessive force. If you’re struggling, take a moment and re-read your manual. Sometimes, a quick wipe-down of the folding joints can help them move more freely. Lubrication is rarely needed unless specified by the manufacturer.
Conclusion
You’ve now learned the essential steps to folding your heavy-duty mobility scooter. By carefully engaging the brake, lowering the tiller, folding the seat, and collapsing the main frame, you can prepare your scooter for storage or transport quickly. Remember to handle any battery removal with care and ensure all parts lock securely. This process makes your scooter much more manageable for travel and everyday life. You’re ready to fold your scooter with confidence!
Frequently Asked Questions
How much effort is usually required to fold a heavy-duty mobility scooter?
Folding a heavy-duty scooter typically requires moderate effort, not excessive force. You’ll be disengaging levers and guiding sections into place. If something feels stuck, check that all locks are fully released before applying more pressure. We’ve found that consistent, gentle movements work best.
Can I leave the battery in my mobility scooter when folding it?
It depends on your specific model. Some heavy-duty scooters allow you to fold them with the battery installed, while others require battery removal for a more compact fold or to reduce weight. Always consult your owner’s manual to know if battery removal is necessary for your scooter.
What if a lever or latch is difficult to release when folding?
If a lever is stiff, check for any locking pins or secondary release mechanisms. Sometimes a small amount of dirt or debris can obstruct movement. Gently cleaning the joint area can help. Never force a stuck lever, as this can cause damage. Re-reading your manual is often the quickest solution.
Will my folded scooter fit in the trunk of a standard car?
Many heavy-duty scooters are designed to fit into the trunks of standard sedans. However, dimensions vary significantly between models. It’s best to measure your scooter’s folded dimensions and compare them to your car’s trunk space. Some users find it easier to place it in an SUV or van.
How do I know if my scooter is locked securely after folding?
Listen for a distinct click when engaging levers or pins. Visually confirm that all sections are flush and appear stable. Give the folded scooter a gentle push to ensure it doesn’t wobble or feel loose. A securely folded scooter should feel solid and compact.
