
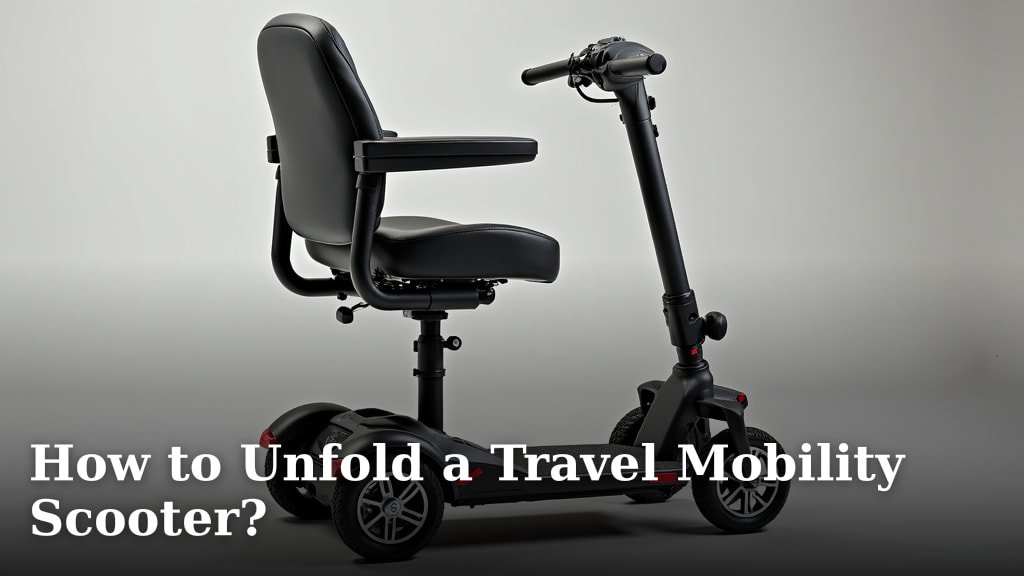
Unfolding your travel mobility scooter is usually a simple process, often involving a few key steps like releasing levers or pressing buttons. Most models are designed for quick and easy setup, making them ready to go in just a minute or two. You’ll want to check your specific model’s instructions, but generally, it’s quite straightforward.
Getting your scooter ready for use involves a few common actions across different brands. We found that understanding these core mechanics can save you a lot of time and frustration. Think of it like getting your favorite chair ready – a quick adjustment and you’re all set for a comfortable ride. It’s all about those simple, effective movements.
- Check for locking mechanisms.
- Release the folding frame.
- Position the tiller and seat.
- Secure all parts before riding.
Let’s walk through exactly how to get your travel mobility scooter unfolded and ready for your next adventure, step by step.
Getting Your Travel Mobility Scooter Ready: A Simple Folding Guide
Unfolding your travel mobility scooter is usually a simple process. Most models are designed for quick and easy setup. You’ll want to check your specific model’s instructions. But generally, it’s quite straightforward and takes only a minute or two.
Think of it like getting your favorite chair ready. A quick adjustment and you’re all set for a comfortable ride. It’s all about those simple, effective movements.
Understanding the Core Folding Mechanism
Most travel mobility scooters use a similar folding system. This system is designed to be intuitive. You’ll find a primary release mechanism. This is often a lever or a button. It allows the main frame to pivot. This is the first step to getting your scooter ready.
Identifying Your Scooter’s Folding Points
Before you even try to unfold, take a look. Where does your scooter fold? Most fold in three main places. This usually includes the tiller, the seat, and the main frame. Knowing these points helps you anticipate the movements. It’s like knowing where the hinges are on a door. You wouldn’t try to open it from the middle, right?
The Tiller: Your Steering Column
The tiller is the part you steer with. It usually folds down. You’ll often find a lever or knob at the base of the tiller. Releasing this allows it to swing down. Sometimes, it folds completely flat. Other times, it just folds to a lower, more compact position. Make sure to listen for a click. This click often means it’s locked securely in place.
The Seat: Your Comfort Zone
Your seat is another key folding point. It might fold down onto the deck. Or, it might be removable entirely for even more compactness. If it folds, look for a latch or button. This is typically on the side or underside of the seat. Release it and gently push the seat down. Some seats may also swivel. You might need to engage a lock for the swivel function.
The Main Frame: The Heart of the Fold
The main frame is the largest part. It’s what connects the wheels and the base. This section typically hinges. You’ll need to release a central locking mechanism. This is often a lever near the base of the seat or on the frame itself. Once released, the frame will swing open. This connects the front and rear sections of your scooter.
Step-by-Step: Unfolding Your Travel Mobility Scooter
Let’s break down the process into actionable steps. This applies to most popular models. Always refer to your owner’s manual for specifics.
Step 1: Prepare Your Scooter’s Location
Find a flat, stable surface. This is important for safety. You don’t want your scooter tipping over. Make sure you have enough space around you. This gives you room to move freely. Clear any obstacles from your path. This ensures a smooth unfolding.
Step 2: Release the Tiller Mechanism
Locate the tiller release lever. It’s usually at the bottom of the tiller column. It might be a large, easy-to-grip lever. Some models use a push-button system. Pull or press the release. Gently lower the tiller. Guide it until it settles into its upright position. You should hear a positive locking sound. This indicates it’s secure. Many scooter manufacturers recommend this as the initial step (Pride Mobility).
Step 3: Unfold the Main Frame
Now, find the main frame release. This is often a lever near the base of the seat. It might be a pull-pin or a larger latch. Engage the release mechanism. This will allow the frame to open. You may need to lift or push the frame slightly. Let it swing open until it’s fully extended. Again, listen for the click of the lock. This confirms it’s stable and ready.
Step 4: Position and Secure the Seat
If your seat folds, unfold it now. Find the seat release latch. It’s usually on the side of the seat post. Release the latch. Lift the seat into its upright position. Ensure it locks firmly into place. Some seats require a slight push down. Others just click when they are aligned correctly. A secure seat is vital for comfortable riding.
Step 5: Final Checks and Securing Everything
Before you hop on, do a quick check. Wiggle the tiller to ensure it’s locked. Test the seat to make sure it’s secure. Look for any other locking pins or levers. Are they all engaged? This is your safety checklist. It ensures everything is firmly in place. You want to feel confident before you ride.
Troubleshooting Common Unfolding Issues
Sometimes, things don’t go as smoothly as planned. Don’t worry, these issues are usually easy to fix.
The Lever Won’t Budge
If a lever feels stuck, don’t force it too hard. First, check for any obstructions. Is there dirt or debris around the mechanism? Try wiggling the component slightly. Gently rocking the tiller or seat can sometimes help. If it’s still stubborn, consult your manual. Sometimes a little lubricant is needed.
A Click Isn’t Heard
The locking sound is important. If you don’t hear it, the part might not be secure. Double-check the lever or pin. Is it fully engaged? Sometimes, you need to apply slight pressure. Push down on the tiller or seat. Make sure it’s seated correctly. If you’re unsure, do not ride. Safety is the top priority.
Uneven Folding or Alignment
If the frame doesn’t seem to align properly, check the hinges. Are they clean and free of debris? Sometimes, a slight misalignment can occur. Try folding and unfolding it again. A gentle nudge might be all it needs. Many experts suggest regular cleaning of these folding points (Mobility Scooters Direct).
Maintaining Your Scooter’s Folding Mechanism
Keeping your scooter in good shape means it will fold and unfold reliably. This isn’t complicated maintenance. It’s mostly about keeping things clean.
Regular Cleaning is Key
After using your scooter, give it a quick wipe down. Pay attention to the folding joints and levers. Dirt and dust can make them stiff. Use a damp cloth. For tougher grime, a mild soap solution can work. Ensure you dry the components afterward. This prevents rust.
Lubrication for Smoothness
Occasionally, the hinges and joints might need a bit of lubrication. Use a silicone-based spray. Apply it sparingly to the moving parts. Do this about once every few months. Or, whenever you notice stiffness. This keeps everything moving smoothly and quietly. Avoid using oil-based lubricants. They can attract more dirt.
Check for Wear and Tear
Periodically inspect the levers and pins. Make sure they aren’t bent or damaged. Look at the cables if your scooter has them for folding. Are they frayed? Any signs of damage mean you should get it checked. This proactive approach ensures your scooter remains safe.
A Quick Checklist for Unfolding Success
Before you head out on your next trip, run through this quick checklist. It ensures your scooter is ready for action.
- Is the ground surface stable and flat?
- Did you hear a distinct click when locking the tiller?
- Is the main frame fully extended and locked securely?
- Does the seat feel firmly attached and stable?
- Are all visible locking pins or levers engaged?
- Give a gentle wiggle to confirm everything is solid.
Conclusion
You’ve learned the straightforward steps to unfold your travel mobility scooter. Remember, it’s all about those simple movements: releasing the tiller, unfolding the frame, and securing the seat. A quick check ensures everything is locked in place for your safety. With a little practice, you’ll have your scooter ready in no time. Make it a habit to perform these checks before each use. Now, you’re ready to confidently set out on your next journey!
Frequently Asked Questions
What if my scooter’s folding lever is hard to move?
If a lever feels stuck, don’t force it. First, check for any debris around the mechanism that might be blocking it. Gently wiggling the component or the part it connects to can help. If it remains stiff, consult your owner’s manual for specific advice on lubrication.
How do I know if my scooter is properly locked after unfolding?
The most important indicator is an audible “click.” This sound confirms that a locking mechanism, like on the tiller or main frame, has engaged securely. Always give the parts a gentle wiggle afterward to feel that they are solid and stable before riding.
Can I leave my scooter partially unfolded for a short period?
It’s best to fully unfold and secure your scooter before leaving it. Leaving it partially folded can create a tripping hazard. Additionally, it may put stress on the locking mechanisms if it’s bumped or moved unexpectedly.
Does the seat always fold down with the main frame?
Not always. Some scooters have seats that fold separately or might even be removable for maximum compactness. Always check your specific model’s design and refer to your manual to understand how your seat is intended to fold.
How often should I clean my scooter’s folding points?
It’s a good practice to wipe down the folding joints and levers after each use, especially if you’ve been in a dusty environment. Regular cleaning prevents dirt buildup, which can stiffen the mechanisms and make unfolding more difficult over time.
