

To change a mobility scooter battery, you should always turn off your scooter, disconnect the old battery, and carefully replace it with a new one of the same type and voltage. We found this is the most direct way to ensure safety and proper function.
Mobility scooter batteries often need replacing after a few years of regular use. Knowing how to safely swap them out can save you time and money. You don’t always need a technician for this common task. We’ll show you how to do it yourself, or when to seek professional help.
- Power off your scooter completely.
- Locate the battery compartment.
- Disconnect the old battery terminals.
- Carefully remove the old battery.
- Install the new battery and reconnect.
- Test your scooter to ensure it works.
Let’s walk through changing a mobility scooter battery step by step. You’ll gain independence and confidence with your scooter’s upkeep.
Getting Started: Preparing for Your Battery Swap
Before you even think about touching your scooter’s battery, a little preparation goes a long way. We found that a few minutes of planning can save you headaches later. You want to make sure you have everything ready before you start.
The first and most important step is safety. Your mobility scooter runs on powerful batteries. Messing with them incorrectly can be dangerous. Always treat them with respect.
Safety First: What You Need to Know
Working with batteries involves electricity. Improper handling can lead to shocks or even fires. We always recommend wearing protective gear. Your safety should be your top priority.
- Gloves: Protect your hands from dirt and potential acid.
- Eye Protection: Safety glasses are a must. Battery acid can splash.
- Work in a Ventilated Area: Batteries can release gases.
- Remove Jewelry: Metal jewelry can create a short circuit.
It’s also a good idea to have a fire extinguisher nearby. Just in case. While unlikely, it’s always better to be safe than sorry. Accidents can happen, but good preparation minimizes risk.
Gathering Your Tools and Supplies
You don’t need a huge toolkit for this job. Most battery changes are pretty straightforward. We found that a few basic items make the process much smoother. Having the right tools prevents frustration.
Do you have a wrench? How about a screwdriver? These are often what you’ll need. Make sure they are the correct size for your scooter’s battery terminals. Loose connections are no good.
- Wrench Set (usually 10mm or 13mm): To loosen/tighten battery terminals.
- Screwdriver (Phillips or flathead): For battery compartment covers.
- Battery Terminal Cleaner (optional but recommended): To clean corrosion.
- New Mobility Scooter Battery: The right one for your model.
- Camera or Smartphone: To take pictures as you go.
Why a camera? Because remembering how things connect can be tricky. A quick snap of the wiring before you disconnect anything can be a lifesaver for reassembly. Trust us; your future self will thank you.
And what about that new battery? Make sure it’s fully charged before you install it. A little proactive charging will have you up and running faster. No one likes to wait. We found this step often gets overlooked.
Finding the Right Battery for Your Scooter
Choosing the correct replacement battery is critical. It’s not a one-size-fits-all situation. The wrong battery can harm your scooter and void your warranty. We found that matching your existing battery is the best approach.
Look at your scooter’s manual first. It will specify the type and voltage. If you don’t have the manual, the battery itself will have labels. These labels contain important information.
Understanding Battery Types and Specifications
Mobility scooters typically use Rechargeable Sealed Lead Acid (SLA) batteries. These are often Gel or Absorbed Glass Mat (AGM) types. Each type has its own characteristics. But they look similar.
Why are there different types? Gel batteries are usually more expensive but can handle deeper discharges. AGM batteries are a good all-around choice. They are lower maintenance. We found that most scooters use one of these two. (Mobility Scooter Resource Center)
The key specifications you need to match are:
- Voltage (V): Most scooters use 12V batteries, and often two of them for a 24V system.
- Amp-Hours (Ah): This indicates how much power the battery can store. Match this number for similar range.
- Physical Size: The new battery must fit in the compartment.
- Terminal Type: Make sure the new battery has terminals compatible with your existing connectors.
We found that checking all these details helps avoid returns. Nobody wants to find out their new battery doesn’t fit or connect. This upfront check saves time and hassle. It’s like checking the size of your new shoes before buying.
Here’s a quick comparison of common battery types for mobility scooters:
| Battery Type | Pros | Cons | Common Use |
|---|---|---|---|
| AGM (Absorbed Glass Mat) | Maintenance-free, good for vibration, charges quickly. | Sensitive to overcharging, can be more expensive than flooded. | Most modern scooters, good for general use. |
| Gel Cell | Deep cycle, spill-proof, thrives in extreme temperatures. | Slower charging, heavier, higher cost. | Heavy-duty scooters, frequent deep discharge. |
| Lithium-ion | Lightweight, long lifespan, fast charging. | Highest cost, specific charging requirements. | Newer, high-end scooters, very active users. |
While Lithium-ion batteries are becoming more popular, they are still less common for replacement. You’ll likely be choosing between AGM and Gel. We suggest sticking with what your scooter originally came with unless you’re advised otherwise by a professional.
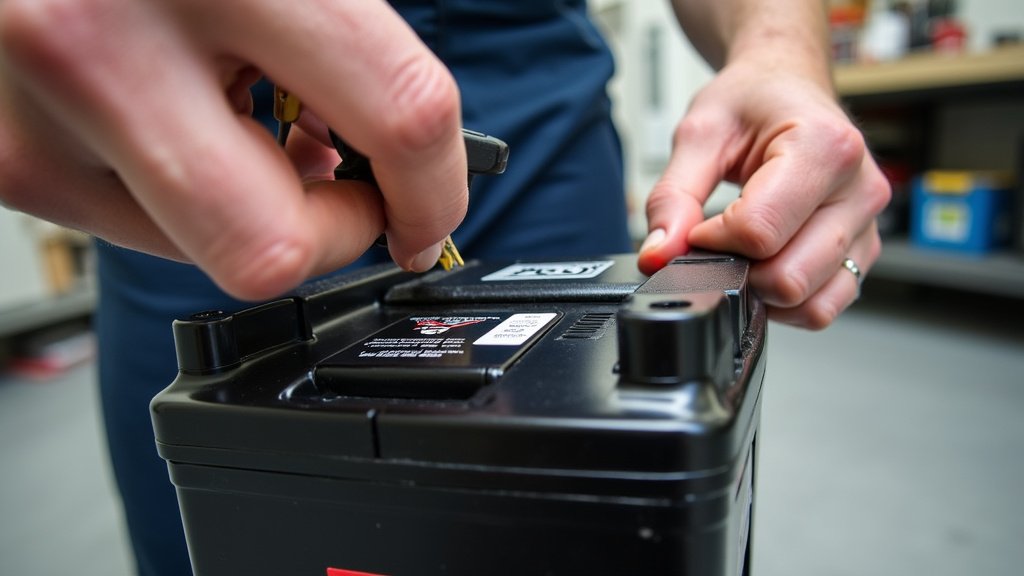
Step-by-Step Battery Replacement Process
You’re ready. You have your tools. Your new battery is charged. Now we can get into the actual physical replacement. This sequence is important. Following it carefully ensures safety and success. We found this method to be the most reliable.
Accessing the Battery Compartment
First, turn off your scooter completely. Remove the key. You do not want any accidental power. Consider this your golden rule. Safety first, always.
Locating the battery compartment is next. It varies by scooter model. Some have them under the seat. Others tuck them away in the footboard. Refer to your scooter’s manual if you’re unsure. You might need your screwdriver here. Gently remove any covers or plates. Don’t force anything. We found that patience prevents damage.
Disconnecting the Old Battery
This is where things can get a little tricky. You’ll see wires connected to battery terminals. Remember those pictures you took? This is where they come in handy. Observe the wiring sequence before you disconnect anything. Many experts tell us this is a critical step.
Start with the negative terminal first. This is usually marked with a “—” sign and often has a black wire. Use your wrench to loosen the nut. Then, carefully remove the cable. Keep it away from the positive terminal. You don’t want any sparks. Then, disconnect the positive terminal. This is marked with a “+” sign and usually has a red wire. Always disconnect the negative terminal first. We found this minimizes the risk of short circuits.
If you have multiple batteries, disconnect them one by one. Maintain the same sequence: negative then positive. Take more pictures if you need to. Documentation is your friend. You can’t have too many visual aids.
Removing the Old Battery
Batteries can be heavy. Mobility scooter batteries are no exception. You might need help lifting it out. Lift with your legs, not your back. It’s important to be mindful of your body. We recommend having a friend or family member assist you if you struggle with heavy lifting. (National Institute for Occupational Safety and Health).
Are there straps or clamps holding the battery in place? Loosen or remove those first. Once free, carefully lift the old battery out of its compartment. Set it aside for proper disposal. Don’t just throw it in the trash. Batteries are hazardous waste. We found many local recycling centers accept them.
Installing the New Battery
Now for the good part: putting the fresh power source in. Place the new battery carefully into the compartment. Make sure it sits snugly. There shouldn’t be too much wiggle room. Secure it with any straps or clamps you removed. A stable battery is a safe battery.
Next, it’s time to reconnect the terminals. This is the reverse of disconnecting. Start with the positive terminal first. Connect the red wire to the “+” post. Tighten it securely with your wrench. Then, connect the negative terminal. Connect the black wire to the “—” post. Tighten it well. We found that snug connections prevent power issues.
Confirm all connections are solid. Give the wires a gentle tug. They shouldn’t move. If you replaced multiple batteries, repeat this process for each one. Double-check your wiring against your photos. This step is where mistakes frequently occur. Careful double-checking saves effort.
Final Checks and Testing Your Scooter
Once everything is connected, replace any covers or panels you removed. Ensure they are secure. You don’t want anything rattling loose while you’re riding. A quick visual inspection is always a good idea. Make sure all tools are put away.
Your Battery Replacement Checklist:
- Protective gear worn?
- New battery securely in place?
- Positive (+) terminals connected first?
- Negative (—) terminals connected last?
- All terminals tightened properly?
- Compartment covers reinstalled?
Time for the moment of truth! Turn on your scooter. Does it power up? Does the battery indicator show a full charge? Take it for a short test drive in a safe area. Listen for any unusual noises. Are the lights working? Do the controls respond as they should? We found that a successful test drive builds confidence.
If anything seems off, check your connections again. Make sure everything is tight and in the correct order. If problems persist, it might be time to call a professional. Sometimes, things are more complex than they appear. But usually, you will have successfully swapped your battery!
Conclusion
You now have the knowledge to confidently change your mobility scooter battery. We found that proper preparation and careful execution make this task simple. By following our steps, you enhance your safety and extend your scooter’s life. Remember to always prioritize safety and use the right tools. Take control of your scooter’s maintenance, and keep yourself moving.
Frequently Asked Questions
What is the typical lifespan of a mobility scooter battery?
Mobility scooter batteries generally last between 1 to 2 years with regular use. Their lifespan depends on factors like how often you charge them and how well they are maintained. Consistent charging practices can help maximize their life.
Can I use car batteries in my mobility scooter?
No, you should not use car batteries in a mobility scooter. Car batteries are designed for starting engines and deliver a large burst of power. Mobility scooter batteries are deep-cycle batteries, built
