How to Install Walker Glides
To install walker glides, remove the old caps from the rear legs, then push compatible glides onto the tubing until they fit securely. Check both sides before using the walker.
On this page (8 sections)
- How do you install walker glides?
- How do you choose walker glides that fit?
- Which walker glides suit different users?
- What should you check before using newly installed glides?
- What common installation mistakes should you avoid?
- How should you care for walker glides?
- Are walker glides better than tennis balls?
- How do you decide which walker glides to buy?
To learn how to install walker glides, remove the old caps from both rear legs and push compatible glides onto the tubing until they fit securely. Check that both sides sit evenly and stay in place before using the walker.
This guide covers replacement caps and ski glides fitted to a walker's rear legs. Start by checking your walker's instructions and measuring the tubing, because a glide that is too loose or too tight is not a safe fit.
If you're choosing a walker for seniors, consider its frame style and rear-leg size before buying replacement parts. The same walker may suit one person's walking pattern and feel awkward for another, so make sure the user can control it comfortably.
How do you install walker glides?
Remove the existing rear-leg caps and push each compatible replacement glide onto the tubing until it fits securely. Keep the two sides level, then check the walker before putting weight on it.
- Place the walker on a stable, level surface so it cannot roll or shift while you work.
- Remove the existing caps from both rear legs.
- Align one glide with the first leg and push it onto the tubing.
- Fit the second glide to the other rear leg, aiming for the same height and orientation.
- Check for a secure fit, then set the walker down and confirm that it rests evenly.
Follow the directions for your specific walker and glides if they differ from these general steps. If a cap is difficult to remove or a glide will not slide on, stop and ask the walker maker or a mobility equipment professional for guidance.
How do you install walker ski glides?
Walker ski glides fit on the rear legs after you remove the existing caps. Slide each one onto compatible tubing, then check that both sit evenly and stay secure.
A ski-shaped tip may help the rear of the walker pass over rugs and floor transitions. Some sets include covers intended for indoor use, so check how the covers fit and when to use them.
See our guide to the best walker ski glides if you're choosing between styles. A glide that works on one floor may feel different on another, so consider the surfaces where the walker is used most.
How do you choose walker glides that fit?
Choose by rear-leg diameter, glide shape and intended surface. Measure the tubing and compare it with the glide's stated fit range before you buy.
“Universal fit” doesn't guarantee that every glide fits every walker. For example, Vive says its ski glides fit posts between 1 in and 1 1/8 in, while Tulimed describes its glides for 1 in tubing.
Measure the rear legs rather than relying on a general compatibility label.
Check the leg ends for bent tubing, cracks or damage, and inspect the current caps. A damaged leg may need attention before you install a replacement glide.
Don't cut, stretch or alter a glide to make it fit.
A pair should match in style and height. Mixing different glides or leaving one old cap in place can make the walker sit unevenly and move differently from side to side.
Which walker glides suit different users?
Match the glide to the walker and the user's usual floors. The Vive set suits people who want ski glides with indoor covers, while Tulimed is a simple tool-free option for compatible 1 in tubing.
The Vive Walker Ski Glides & Covers set includes two composite ski glides and two velour covers. Its stated post range is 1 in to 1 1/8 in, and the covers are intended for indoor use.
Choose this set if your rear legs fall within that range and you want covers to use indoors; skip it if your tubing is outside that range or you need a different attachment style.
The Tulimed Gray Walker Ski Glides are tool-free and described for 1 in walker tubing. Tulimed advises against forcing a leg into a glide if it does not slide in.
Choose these when the tubing matches and you want a direct replacement; skip them if your rear legs are a different size or the fit requires force.
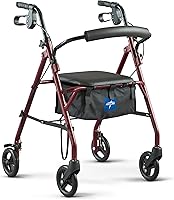
The Drive Medical Two-Button Folding Walker with Wheels is a complete walker, not a replacement glide set. It has 5 in front wheels, rear glide caps, adjustable height and an aluminum frame with a stated 350 lb capacity.
Consider it if you're choosing a walker with front wheels and rear glides; skip it if you only need replacement parts for an existing walker.
For more replacement options, see our guide to the best walker glides. If the walker is used on wood floors, compare the best walker glides for hardwood floors and follow the care directions for the floor and glide.
What should you check before using newly installed glides?
Confirm that both glides are secure, level and in contact with the floor before walking. Stop if either one shifts, rocks or sits at a different height.
With the walker on a flat surface, look for a gap between each glide and its leg. Gently check each glide by hand, then press the walker lightly to see whether the frame stays even.
Don't use it if a glide moves or the walker rocks.
After the fit check, the user can hold the walker as usual and take a few careful steps in a clear area. Pay attention to whether the rear slides smoothly and whether both sides move in a similar way.
If the frame feels unstable or behaves differently, stop and recheck the parts.
What common installation mistakes should you avoid?
The main mistakes are choosing the wrong size, forcing a glide and using mismatched parts. Each can leave the walker uneven or make a glide come loose.
Don't assume a glide fits simply because it looks close to the right size. Don't hammer, cut or stretch it to force a fit, and don't use a replacement with a damaged leg.
If a glide won't slide on as intended, check the diameter and attachment style.
Also avoid fitting only one rear leg, leaving one old cap in place, or ignoring wear. Check both sides periodically, especially if a glide begins to wobble or the walker starts moving unevenly.
How should you care for walker glides?
Keep the glide surfaces clear of dirt and check them for wear or cracks. Follow any care instructions that came with the glides, particularly when using covers.
Remove debris that could catch between the glide and floor. If the set includes removable covers, check that they are fitted as directed and are not bunched or loose.
Replace a glide that is cracked, badly worn or no longer stays attached.
For indoor and outdoor use, remember that the surface changes how the walker moves. A glide that slides easily across one floor may feel faster or slower on another, so use care when moving between surfaces and rugs.
Are walker glides better than tennis balls?
Glides are made to attach to walker legs, while tennis balls need openings cut into them. The right choice depends on the walker's fit and the way the user moves it.
Read our comparison of walker glides vs tennis balls before choosing. If you switch styles, remove the old parts and make sure both rear legs have matching attachments that fit securely.
Walker accessories for a different device have different mounting points and steps. Our guides explain how to install a mobility scooter basket and how to install a mobility scooter canopy.
How do you decide which walker glides to buy?
Choose Vive if you want ski glides with indoor covers and your tubing measures 1 in to 1 1/8 in. Choose Tulimed if you want tool-free glides for compatible 1 in tubing, and choose a complete walker only if you need to replace the walker itself.
Measure first, then match the glide to the rear legs and the surfaces where it will be used. After installation, use the walker only when both glides sit securely and the frame rests evenly.
If the fit is uncertain or the walker feels different, contact the walker maker or a mobility equipment professional before use.
Frequently asked questions
How do you install walker ski glides?
Remove the existing caps from the rear legs, then push compatible ski glides onto the tubing until they fit securely. Check that both glides sit evenly and do not wobble before use.
Follow the specific fit guidance, and don't force a glide that won't slide onto the leg.
Do walker glides fit every walker?
No. Glides have to match the walker leg's size and shape.
Some styles specify a tube diameter or walker type, so measure the rear leg and check compatibility before buying.
Don't force a glide that won't slide on smoothly.
Can you put ski glides on a walker with wheels?
Many standard walkers use front wheels and rear glides, but compatibility depends on the walker and replacement parts. Check the walker's instructions and the glide's fit guidance before changing parts.
If your setup is different, ask the walker maker or a mobility equipment professional which parts fit.
How do you know walker glides are installed correctly?
Both glides should sit securely on the rear legs, with no visible gap or wobble. Set the walker on a flat surface and check that it rests evenly before use.
If a glide shifts or does not fit the tubing, stop and check compatibility.